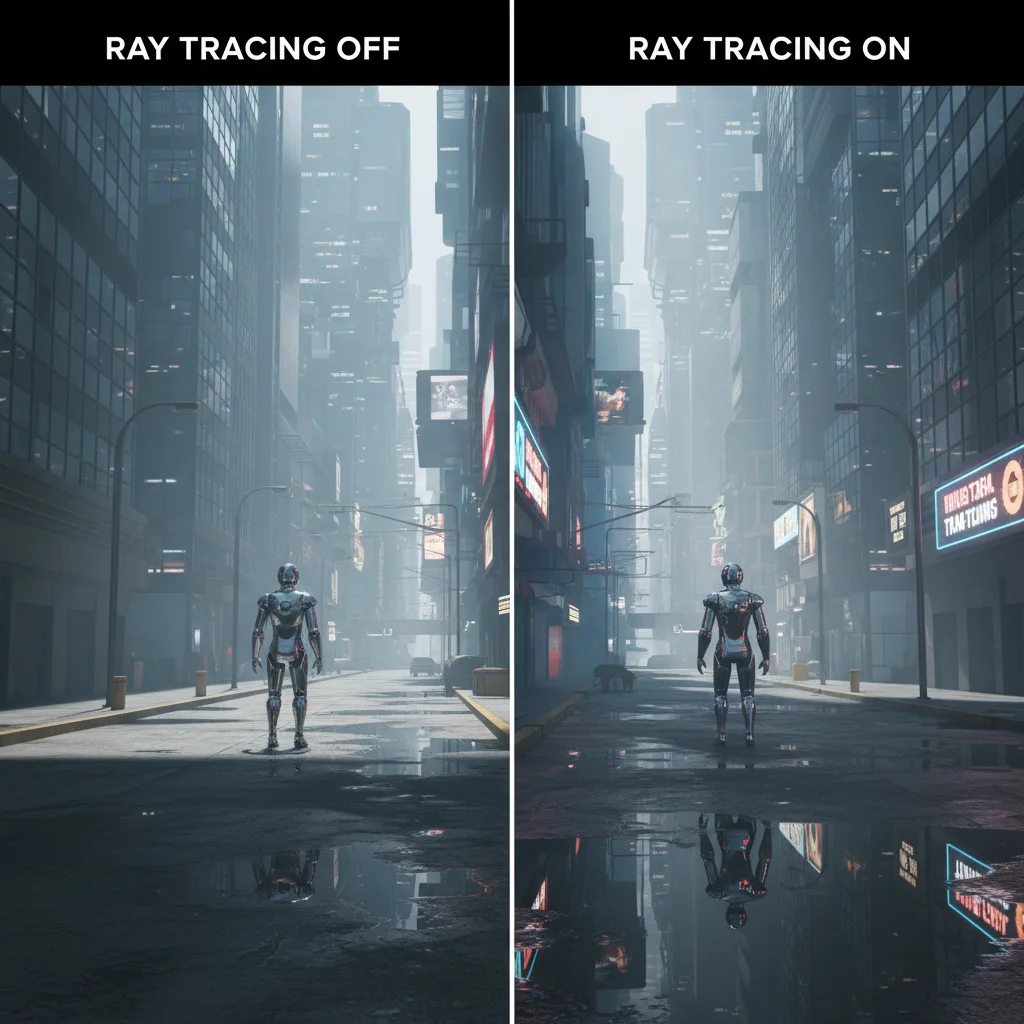
In the ever-evolving world of PC gaming, ray tracing stands as a beacon of visual fidelity, promising breathtaking realism with its accurate simulations of light, reflections, and shadows. Once the exclusive domain of high-end rigs, the dream of experiencing games with this advanced rendering technique at a smooth 60 frames per second (FPS) on a mid-range gaming PC is becoming increasingly attainable. This comprehensive guide will delve into the strategies, settings, and hardware considerations necessary to optimize ray tracing and achieve that coveted 60 FPS benchmark, even if you’re not sporting the latest, most expensive hardware.
The allure of ray tracing is undeniable. Imagine reflections that accurately mirror the environment, shadows that softly diffuse and deepen based on light sources, and global illumination that bathes scenes in a natural, immersive glow. These elements transform a game’s aesthetic from merely good to truly spectacular. However, this visual splendor comes at a performance cost. Ray tracing is computationally intensive, requiring significant GPU horsepower. For many gamers with mid-range systems, the initial thought might be that 60 FPS with ray tracing is an impossible dream, leading them to either disable it entirely or endure choppy framerates.
But fear not! With the right approach, a bit of tweaking, and an understanding of the underlying technologies, you can absolutely enjoy ray tracing in many current titles without breaking the bank or sacrificing smooth gameplay. This article will be your roadmap to unlocking that potential, covering everything from essential hardware checks to granular in-game settings and the magic of upscaling technologies. Our goal is to empower you to optimize ray tracing for a truly immersive and fluid gaming experience.
Understanding Ray Tracing and Its Demands
Before we dive into optimization, it’s crucial to understand what ray tracing is and why it’s so demanding. Unlike traditional rasterization, which approximates how light interacts with objects, ray tracing simulates individual light rays bouncing off surfaces. This creates incredibly accurate reflections, refractions, shadows, and global illumination. Each ray calculation is complex, and for a game to render a scene, millions of these rays must be traced per frame. This is why dedicated hardware, like NVIDIA’s RT Cores and AMD’s Ray Accelerators, was developed to handle these computations efficiently.
The Mid-Range Definition
For the purpose of this guide, a mid-range gaming PC typically includes GPUs such as the NVIDIA RTX 3060/3060 Ti, RTX 4060/4060 Ti, AMD RX 6700 XT, or RX 7700 XT. CPUs might range from Intel Core i5/i7 (10th gen or newer) or AMD Ryzen 5 (3000 series or newer). While these components are powerful, they aren’t top-tier, meaning we’ll need to be smart about how we utilize them to optimize ray tracing performance.
Essential Hardware Checks and Updates
Even before touching in-game settings, ensuring your system is in prime condition is paramount. This foundational step can significantly impact your ability to optimize ray tracing effectively.
GPU Drivers: Your First Line of Defense
Always, and we mean always, keep your graphics drivers updated. NVIDIA and AMD frequently release game-ready drivers that include performance optimizations and bug fixes specifically for new titles and ray tracing implementations. A driver update can sometimes yield a surprising FPS boost.
- NVIDIA: Use GeForce Experience or download directly from NVIDIA’s website.
- AMD: Use AMD Software: Adrenalin Edition or download from AMD’s website.
System RAM: The More, The Merrier
While ray tracing primarily taxes the GPU, sufficient RAM (16GB is highly recommended) ensures your system doesn’t bottleneck due to memory paging. If your system is constantly swapping data between RAM and your storage drive, performance will suffer, regardless of your GPU.
Storage: SSD is Non-Negotiable
If you’re still gaming on a Hard Disk Drive (HDD), it’s time to upgrade to a Solid State Drive (SSD). Modern games, especially those with ray tracing, stream a lot of data. An SSD (NVMe preferred) drastically reduces loading times and can prevent stuttering caused by asset loading, contributing to a smoother 60 FPS experience.
In-Game Settings: The Art of Compromise
This is where the real work of optimizing ray tracing begins. Achieving 60 FPS often involves a delicate balance of visual quality and performance. The key is to identify which settings have the biggest impact and adjust them strategically.
Ray Tracing Quality: Not All Rays Are Equal
Most games with ray tracing offer different quality presets (e.g., Low, Medium, High, Ultra). Start by experimenting with these. Often, the visual difference between ‘High’ and ‘Ultra’ ray tracing might be subtle, but the performance hit can be substantial. Aim for ‘Medium’ or ‘High’ settings as a starting point. Sometimes, even ‘Low’ ray tracing can offer a significant visual upgrade over no ray tracing at all.
Individual Ray Tracing Effects: Pick Your Battles
Some games allow you to toggle individual ray tracing effects (reflections, shadows, global illumination, ambient occlusion). This is a powerful tool for optimization. Decide which effects you value most:
- Ray-Traced Reflections: Often the most visually impactful and performance-heavy. If you’re struggling, consider reducing their quality or disabling them first.
- Ray-Traced Shadows: Can add incredible depth and realism. They might have a moderate performance impact.
- Ray-Traced Global Illumination (RTGI): Provides realistic indirect lighting. Can be very demanding but also very immersive.
- Ray-Traced Ambient Occlusion (RTAO): Adds realistic contact shadows. Usually has a lower performance impact than other RT effects.
Experiment by enabling only one or two effects you deem most important and see how your FPS holds up. For instance, enabling only RT reflections on ‘Medium’ might give you a great visual boost without crippling performance.
Traditional Graphics Settings: The Unsung Heroes of Optimization
While you’re focused on ray tracing, don’t forget the impact of traditional rasterization settings. Reducing these can free up GPU resources for ray tracing, helping you hit that 60 FPS target.
- Shadow Quality (Non-RT): Even with ray-traced shadows, traditional shadow settings for distant objects or less critical scenes can be lowered.
- Volumetric Fog/Clouds: These can be incredibly demanding. Reducing their quality can yield significant FPS gains.
- Anti-Aliasing: TAA (Temporal Anti-Aliasing) is common and generally good. If you’re using a demanding AA method like MSAA, consider switching to TAA or even FXAA if absolutely necessary. However, with upscaling technologies (discussed next), you might not need aggressive AA.
- Post-Processing Effects: Motion blur, depth of field, lens flare, film grain – these are often aesthetic choices and can sometimes have a minor performance impact. Experiment with disabling them.
- Texture Quality: Generally, texture quality has a larger impact on VRAM usage than raw FPS, but if your GPU has limited VRAM (e.g., 8GB or less), reducing texture quality can prevent stuttering.
- Draw Distance/LOD: Reducing these can lower the number of objects rendered at a distance, improving performance.
The Game Changers: Upscaling Technologies (DLSS, FSR, XeSS)
This is arguably the most crucial section for mid-range systems trying to optimize ray tracing. Upscaling technologies are nothing short of magical when it comes to boosting performance without a massive hit to visual quality.
How They Work
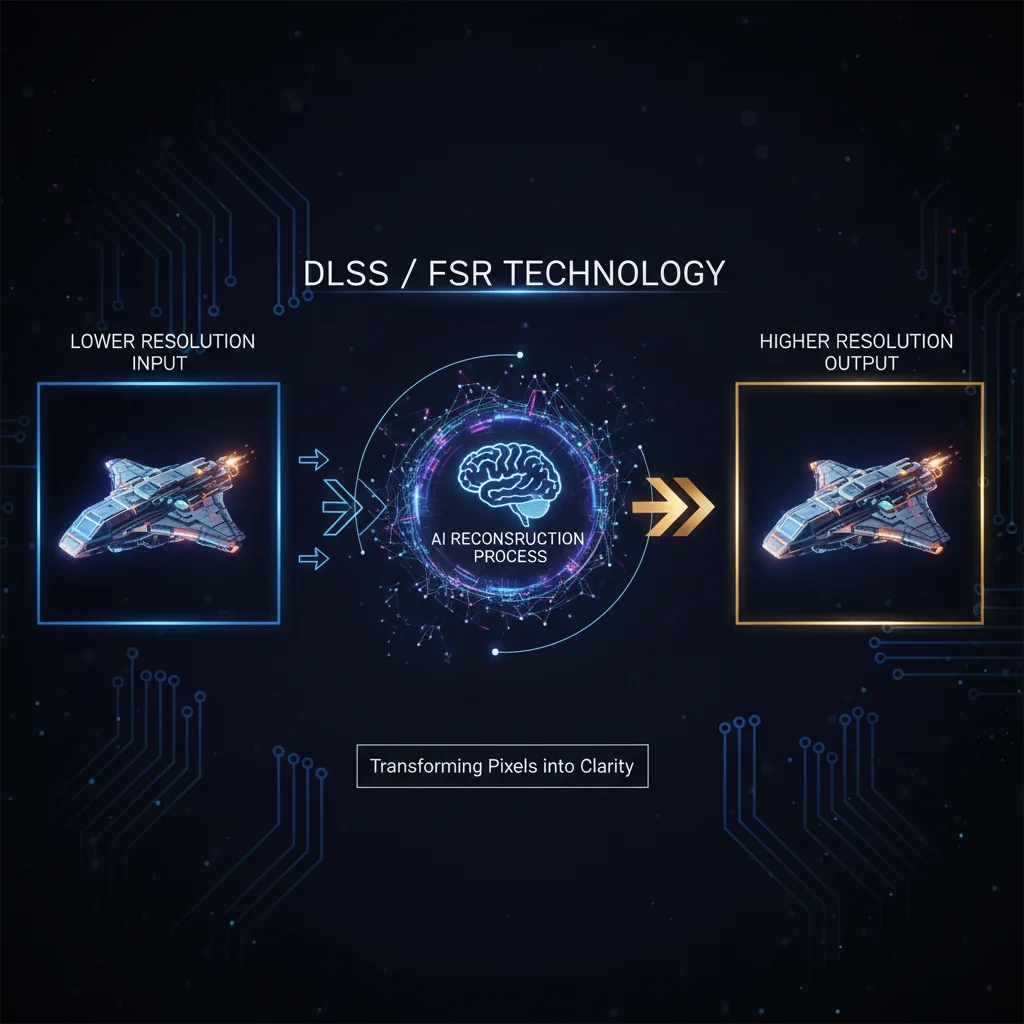
These technologies render the game at a lower internal resolution and then use advanced algorithms (often AI-powered) to upscale it to your monitor’s native resolution. The result is an image that looks very close to native resolution but with significantly higher performance.
- NVIDIA DLSS (Deep Learning Super Sampling): Exclusive to RTX GPUs. Uses AI and Tensor Cores to reconstruct frames. Generally considered the gold standard for image quality and performance boost.
- AMD FSR (FidelityFX Super Resolution): Open-source and compatible with a wider range of GPUs (AMD, NVIDIA, Intel). While not AI-powered, FSR 2.0 and 3.0 offer excellent image quality.
- Intel XeSS (Xe Super Sampling): Intel’s competitor, compatible with Intel Arc GPUs and other vendors. Uses AI or matrix math depending on hardware.
Strategic Implementation
Always enable one of these technologies if available in your game, especially when using ray tracing. Start with the ‘Quality’ preset, which offers the best balance of image quality and performance. If you need more FPS, move to ‘Balanced’ or ‘Performance’. ‘Ultra Performance’ should be a last resort, as image quality can degrade noticeably.
By combining ray tracing with an upscaling technology, you can often achieve a 60 FPS experience that would be impossible at native resolution. This synergy is key to making ray tracing viable on mid-range hardware.
Operating System and Background Processes
Your operating system and background applications can subtly yet significantly impact game performance. Optimizing these can offer those few extra frames needed to reach 60 FPS.
Windows Game Mode
Ensure Windows Game Mode is enabled (Settings > Gaming > Game Mode). This prioritizes system resources for your game, reducing background interference.
Disable Unnecessary Background Apps
Close any applications you don’t need while gaming: web browsers with many tabs, streaming software, Discord (unless you’re actively using voice chat), email clients, etc. Every little bit of RAM and CPU usage saved contributes to better game performance.
Power Plan Settings
Set your Windows Power Plan to ‘High Performance’ or ‘Ultimate Performance’. This ensures your CPU isn’t throttled and can deliver its full potential. (Search ‘Edit power plan’ in Windows search bar).
Overlays and Monitoring Software
While useful for monitoring, some overlays (like GeForce Experience overlay, Steam overlay, Discord overlay) can introduce minor performance overhead. If you’re chasing every frame, try disabling them temporarily.
Specific Game Optimizations and Community Wisdom
Every game is different, and what works for one might not work for another. It’s often beneficial to look for game-specific optimization guides.
Consult Community Forums and Guides
Before diving deep into individual settings, check online forums (Reddit, Steam community, PC gaming websites) for your specific game. Other players with similar hardware often share their optimal settings to optimize ray tracing.
Benchmarking Tools
Many modern games include built-in benchmarking tools. Use them! They provide a consistent way to test different settings combinations and see their impact on FPS without having to play through sections repeatedly.
Modding and Configuration Files
For some older or highly moddable games, you might find community-made mods or configuration file tweaks that can significantly improve performance or allow for better ray tracing implementation. Proceed with caution and always back up original files.
Monitoring Your Performance
You can’t optimize what you don’t measure. Using an FPS counter and hardware monitoring tools is essential to understand the impact of your changes.
- Built-in Game FPS Counters: Many games have an option to display FPS.
- GPU Software: GeForce Experience (NVIDIA) and AMD Software: Adrenalin Edition both have performance overlays.
- Third-Party Tools: MSI Afterburner (can monitor all hardware metrics and display an overlay), Fraps, RivaTuner Statistics Server (often bundled with MSI Afterburner).
Pay attention not just to average FPS, but also 1% and 0.1% lows. These indicate stuttering and can be more disruptive than a slightly lower average FPS.
Future-Proofing Your Mid-Range Rig (Within Reason)
While this guide focuses on current hardware, a few considerations can help you stay ahead of the curve.
CPU and Motherboard Considerations
If you’re planning a future upgrade, consider a CPU and motherboard platform that offers upgrade paths. A more powerful CPU can sometimes reduce CPU bottlenecks, which can indirectly help GPU performance in some scenarios, especially when rendering complex scenes with many objects that need to be processed.
Power Supply Unit (PSU)
Ensure your PSU has enough wattage to handle your current components and any potential future upgrades. A stable and sufficient power supply is crucial for consistent performance.
Cooling Solutions
Keeping your components cool is vital. Overheating can lead to thermal throttling, where your CPU or GPU reduces its clock speed to prevent damage, resulting in lower FPS. Ensure good airflow in your case and consider upgrading your CPU cooler if temperatures are consistently high.
Case Studies: Optimizing Ray Tracing in Popular Titles
Let’s consider a few examples of how these principles apply to specific games:
Cyberpunk 2077
This game is a poster child for ray tracing’s visual impact and performance demands. On a mid-range RTX 3060/4060, achieving 60 FPS with ray tracing requires careful tuning:
- Enable DLSS (or FSR if using AMD): This is non-negotiable. Start with ‘Quality’ mode.
- Ray Tracing Preset: Start with ‘Ray Tracing Medium’.
- Individual RT Effects: If ‘Medium’ isn’t hitting 60 FPS, try ‘Ray Tracing Reflections’ on ‘Medium’ and disable other RT effects, or lower ‘Ray Tracing Shadows’ to ‘Medium’.
- Traditional Settings: Lower ‘Volumetric Fog Quality’ and ‘Cloud Quality’ to ‘Medium’ or ‘Low’. Reduce ‘Screen Space Reflections Quality’ (if not using RT reflections) and ‘Cascaded Shadows Range’ if needed.
Control
Another early adopter of ray tracing, Control benefits greatly from RT reflections and global illumination.
- Enable DLSS (or FSR): Essential for performance.
- Ray Tracing Preset: ‘High’ or ‘Medium’ is a good starting point.
- Individual RT Effects: Prioritize ‘Ray-Traced Reflections’ and ‘Ray-Traced Global Illumination’. You might be able to lower or disable ‘Ray-Traced Shadows’ or ‘Ray-Traced Ambient Occlusion’ if necessary.
- Traditional Settings: Lower ‘Volumetric Lighting Quality’ if you need more frames.
Dying Light 2 Stay Human
This game features impressive ray-traced global illumination and shadows.
- Enable DLSS/FSR: Crucial.
- Ray Tracing Preset: Start with ‘Ray Tracing’ preset on ‘Balanced’ or ‘Performance’.
- Individual RT Effects: Focus on ‘Raytraced Global Illumination’ and ‘Raytraced Shadows’. You might need to lower their quality or disable one if performance is too low.
- Traditional Settings: Adjust ‘Fog Quality’, ‘Shadow Quality’, and ‘Contact Shadows’ to free up resources.
Conclusion: The Path to Ray Traced Glory
Achieving 60 FPS with ray tracing on a mid-range gaming PC is no longer a pipe dream. It requires a thoughtful and systematic approach. By understanding the demands of ray tracing, keeping your drivers updated, optimizing your system, and making smart compromises in game settings – especially leveraging the power of upscaling technologies like DLSS or FSR – you can significantly enhance your visual experience without sacrificing smooth gameplay.
Remember, the goal is not always to max out every single setting, but to find the sweet spot where visual fidelity meets playable frame rates. Each game and system combination will have its own unique optimal configuration. Be patient, experiment with the settings, monitor your performance, and don’t be afraid to make adjustments. With this guide, you are well-equipped to optimize ray tracing and immerse yourself in the stunning, ray-traced worlds that modern gaming has to offer, all while maintaining that buttery-smooth 60 FPS experience on your capable mid-range rig.
Happy gaming, and may your frames be high and your reflections realistic!